
Filters with parameters in Quicksight are one of the key features that allow the users to interact with the filters to get the desired visuals and tables as per the selections made on the filters. To have the filters on the dashboard that can be available for the users to make selections, it is necessary to create a parameter first and then apply the created parameter to the field in the filter section, after which the filters would be available for the users to make selections. Let’s dive into it.
Creating parameters:
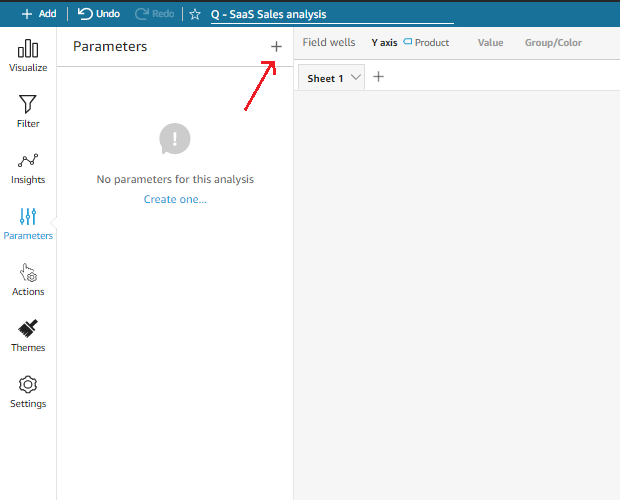
- After creating a new analysis for the dataset, we will have a bunch of selections available for us to choose from on your left where we need to select the parameters option which prompts a pop-up window with a plus icon on the top right corner.
- once you click the plus icon, it prompts another pop-up window to create new parameter having a name, data type, values, and static default value to be filled in.
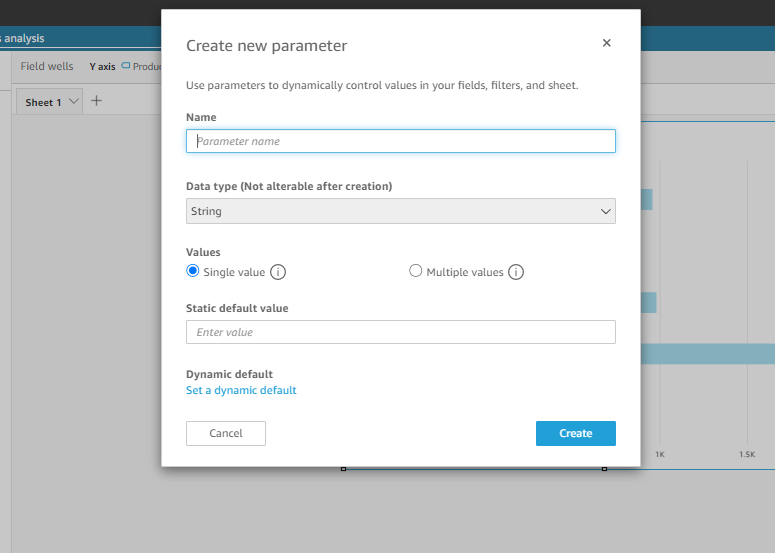
- The name tab is for the parameter name to be entered. Data type is a drop-down where you can choose between integer, string, DateTime, and number(you should choose the data type similar to the field’s data type that you are going to have in the filter). In values you will have two radio buttons to choose from, choosing a single value would allow the users to make one selection at a time in the filter whereas selecting the multiple values here would allow the users to select multiple values in the same filter.
- By entering the static default name, you are setting a default value for the filter which means this value will be selected by default whenever the users open up the dashboard. For the single values, you are allowed to enter only one default value but for the multiple values, you can enter multiple default values as you can.
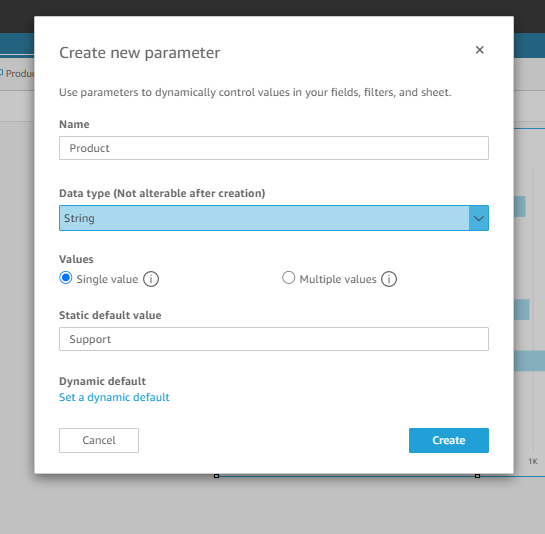
- After filling the values, the pop-up will look something like the above. Then, clicking the create button will take us to another window with the title name as parameter added.

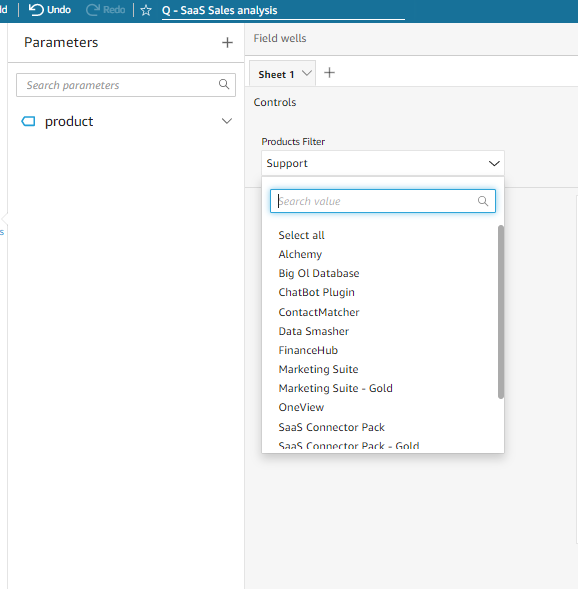
- we need to click on the control option and that prompts another pop-up window with the name Add Control with the name, style, values, dataset, and field
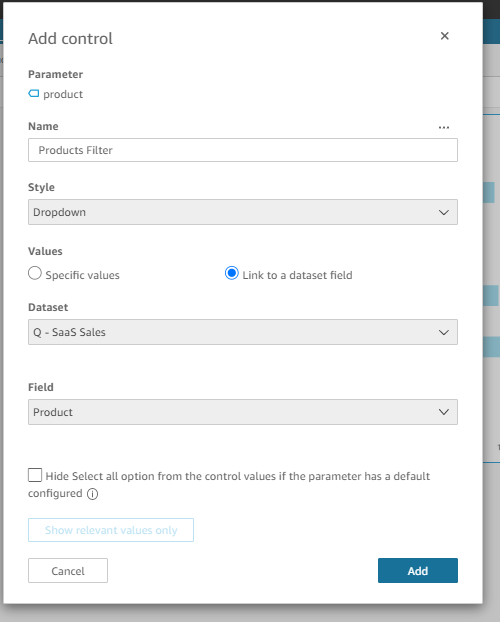
- Here, the Name is for the filter name to be entered. Style has different options to choose from, they are text field, drop-down, slider, and date picker
- Text field – choosing the text field here would allow the user to type in their own value in the filter and it doesn’t show them the option to choose it from the filter.
- Drop down – choosing the drop-down in the style lets the users select a single value or multiple values in the filter. In addition, they get to see all the values of filters to choose from, unlike the text field option.
- Slider – A slider allows users to choose a numerical value by moving the control along the bar from one end to the other. A slider utilizes only numbers.
- Date-picker – date picker will be chosen to create parameters for dates to have the date selection filter on the dashboard.
- Values – values will have two options to choose from specific values and link to the dataset
- Specific values – It has a tab where you can add the values of your field manually and it appears as the options in the filter.
- Link to the dataset – This allows you to choose the dataset and the field, and it takes all of the values automatically from the field and makes them available in the filter.
Then, you click the add button and the parameter is created successfully, however, the filter control won’t be working unless you add the parameter to the appropriate field in the filter pane.
Creating filters:
Following are the procedures to create a filter for the parameters
- As you have created the parameter already, now it’s time to create a filter to apply the parameter. Click the filter option on your left and that will prompt a window with a plus icon in the top right corner.
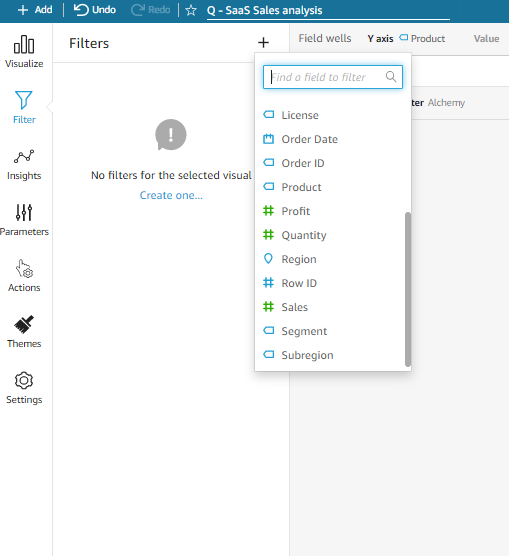
- Click the plus icon and select the appropriate field from the dataset on which you want to apply the parameter.
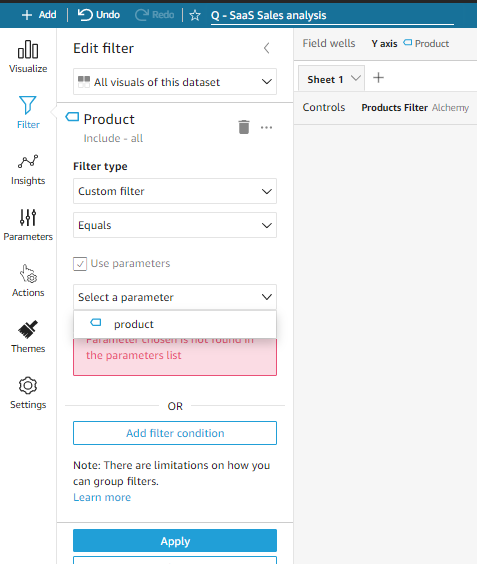
- Then in the filter type, choose the custom filter option, once you do that, you will have a tiny box option to select in order to use parameters. It prompts you to see a list of parameters that you’ve created previously. select the one which you want to apply to the filter and click apply.
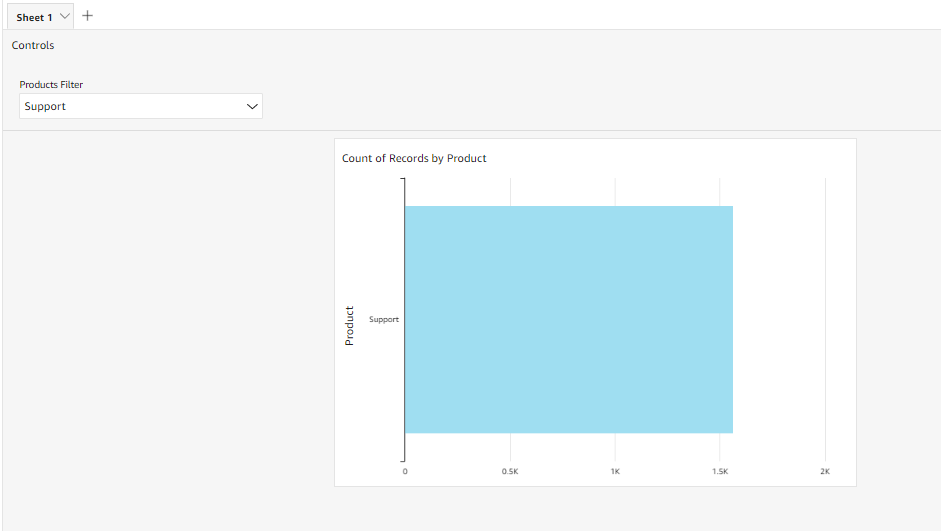
- Now when you go back to the filter on the dashboard, you will see the selection works fine and the visuals on the dashboard change accordingly.
You will also have an option on the filter pane window to choose to apply the filter on all of the visuals in the dataset or the specific visuals. This way when the filters are applied by the users, it will work only for a few visuals or all the visuals and it makes the dashboard meaningful when we don’t want to apply the filters for some visuals.
Learning is what makes me excited. I have a handful of experience as a data and BI analyst with broad skills across various tools. I am also a person who take up challenges and who work for it untill it get resolved. I have learnt to be spontaneous and precision in problem solving because of the experience over the years.