
Navigation action in QuickSight allows users to move between sheets within the same analysis. Specifically, when you click on a visual in one sheet, it navigates to another sheet within the same analysis, providing a detailed breakdown.
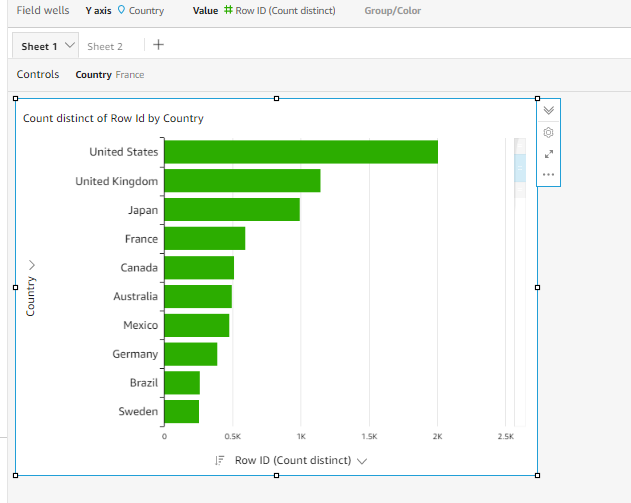
Let’s dive into the action. We have two sheets in the dashboard, and our goal is to navigate from Sheet 1 to Sheet 2 to view the city-wise breakdown based on the bars clicked in the country bar graph on Sheet 1.


Creating parameters:
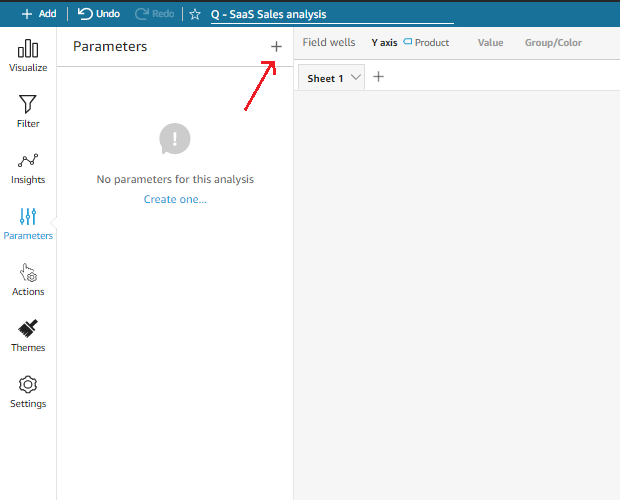

- To create a parameter, select the Parameters option on the left, which opens a window with a plus icon in the top left corner. Clicking on the plus icon will display a pop-up as shown below.
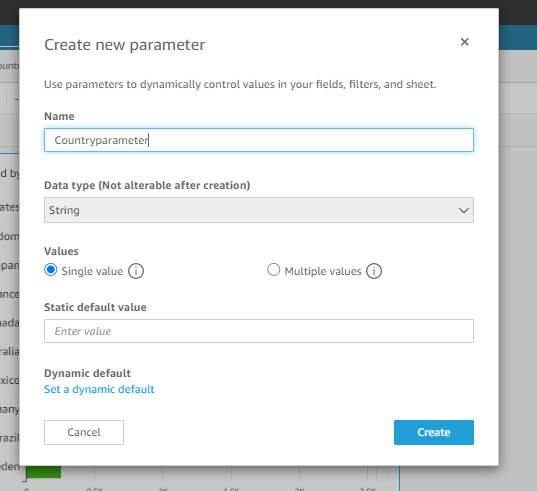

- In the pop-up, enter the parameter name in the Name field. The Data type should be set to String, as we are creating this parameter for the Country field in the dataset. The Value should be set to Single value. Finally, click the Create button.
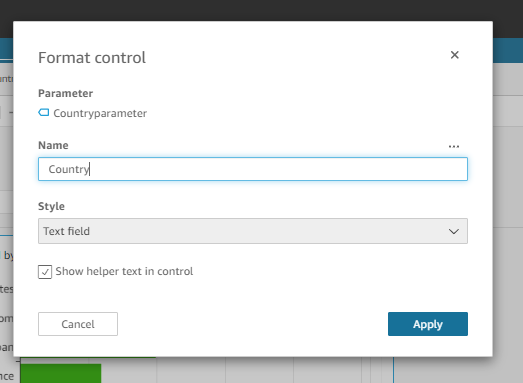
- Now, we will be redirected to another pop-up with four options to choose from. We need to select Control, which will take us to the following window.

Creating Navigation Action:
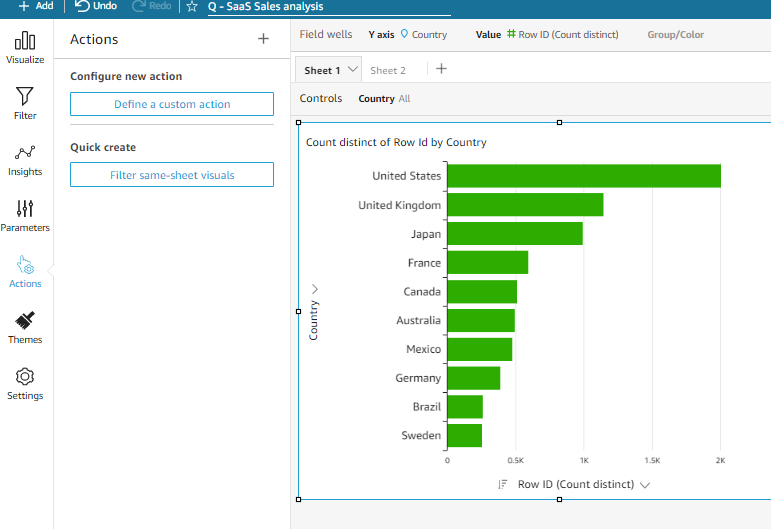
- To create navigation, select Actions from the left menu pane, then click Define a custom action under Configure new action.

- After clicking Define a custom action, you will see a window on the left. In the Action name field, enter your preferred name, and in the Action type drop-down, select Navigation action.
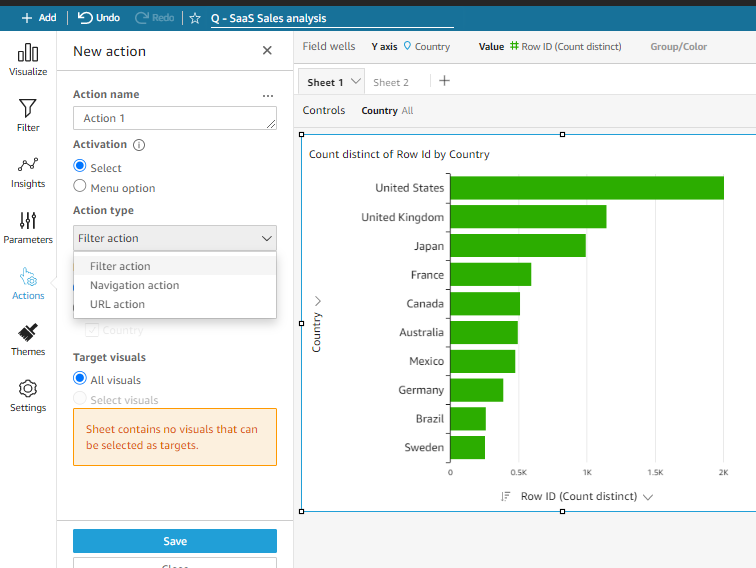

- The Target sheet is the sheet we want to navigate to. In our case, Sheet 2 is the target sheet.
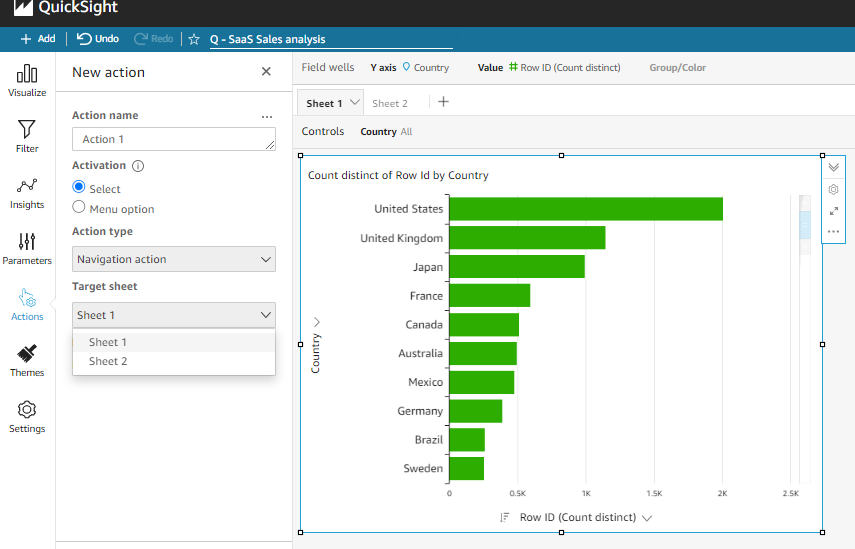

- After selecting the Target sheet, click the plus icon under Parameters. This will open another window where you can choose the Parameter and Field.
![]()

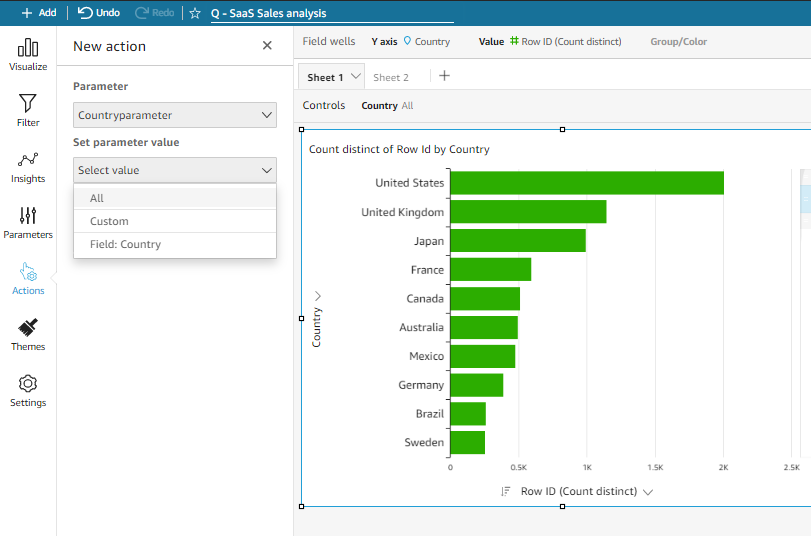
- In the new window, select the parameter you created for the navigation action and choose the field you used in the visual under Set parameter value. However, it will automatically detect the field from the visual since you’re performing the navigation action on it. In my case, as you can see, the field Country is detected from the visual and is displayed as an option in the drop-down.

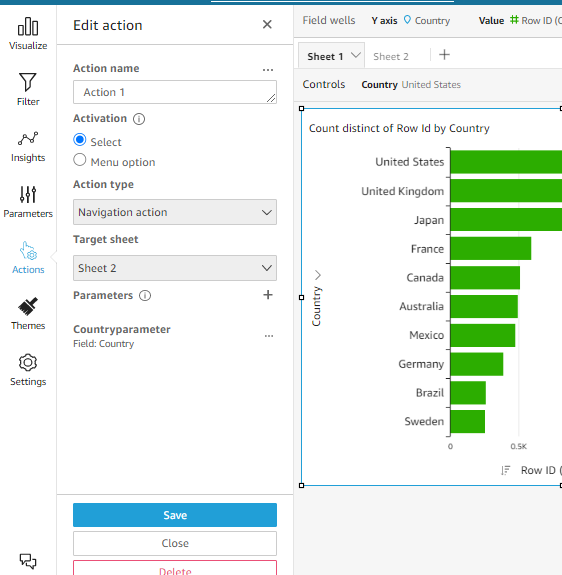
- After selecting the Parameter and Parameter value, click the Add button to add both to the navigation action. The final action window will look something like the image below. Then, click the Save button at the bottom to save the action.

Creating filters:
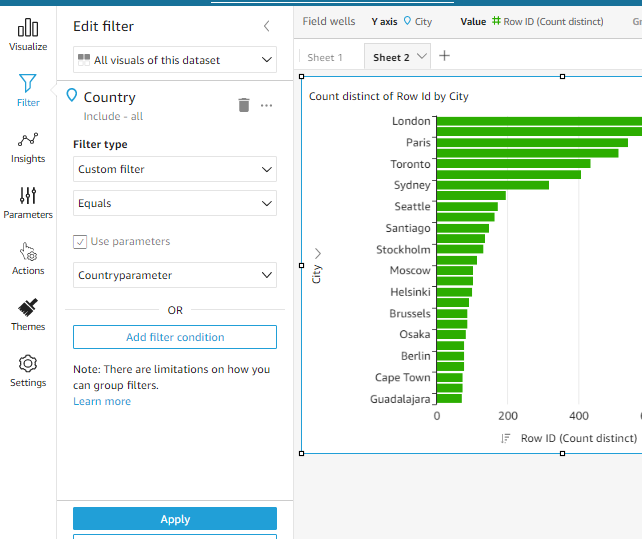
The next step is to switch to Sheet 2 and add the parameter to the Country filter. Select the Filter option on the left, then click the plus icon in the top left corner and choose the field from your dataset. In my case, I will be choosing Country.

- Then select the parameter we created for the navigation action and the final filter of your target sheet would look something like the below. Select the apply button to save the filter.

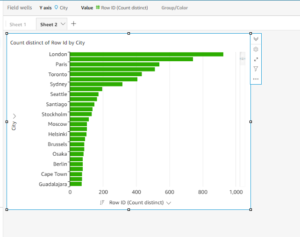
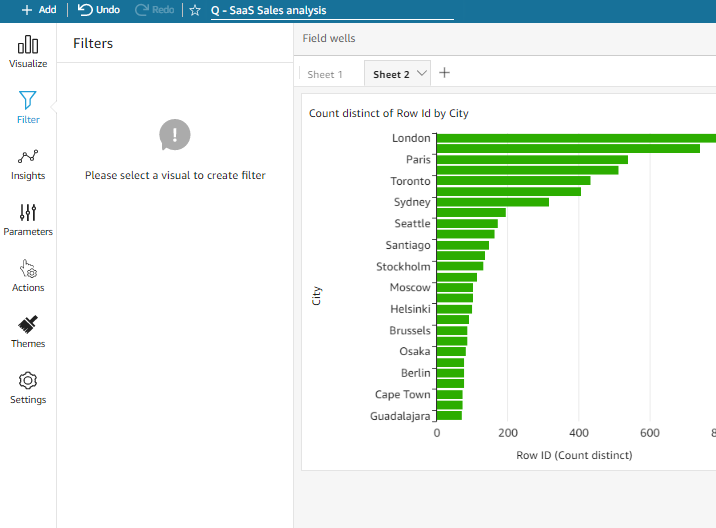
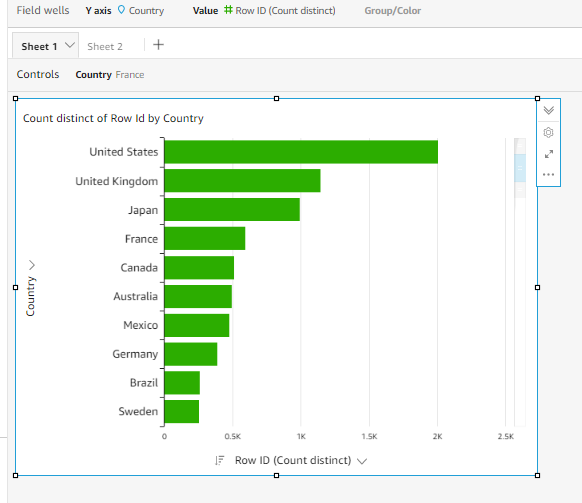
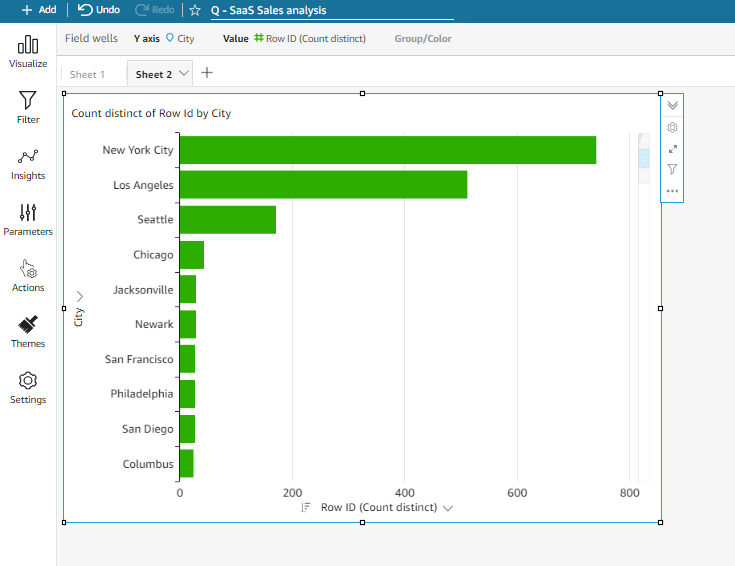
Now, if I go back to Sheet 1 and click on the bars of the Country bar graph, it will navigate me to Sheet 2 and show me the cities that fall under the country I selected in Sheet 1. In my case, as you can see from the following pictures, I selected the United States in Sheet 1, and it navigates me to Sheet 2, providing the city-wise breakdown for the United States.


Navigation action is similar to a sheet action in QuickSight, and it’s really helpful when we want to see a breakdown of a visual on a different sheet. What was explained in this demo was how to navigate from one sheet to another using filter action. However, similar navigation can also be achieved through menu action. I hope the explanation and demonstration have helped you understand it better.


Learning is what makes me excited. I have a handful of experience as a data and BI analyst with broad skills across various tools. I am also a person who take up challenges and who work for it untill it get resolved. I have learnt to be spontaneous and precision in problem solving because of the experience over the years.